Hello there, it is Verity here from Pretty Little Button for the Bumbleberry Design team. I have taken another class over on the Altenew Academy and it was a class where I got to use the Altenew Masking paper. I have had it in my stash for a while, but I hadn't gotten around to use it. But it inspired me for todays card by masking a background for a 1 layer card. I'm not one for making 1 layer cards, and yes technically the heat embossed sentiment on this card is popped up on a little bit of foam, but otherwise the rest of it is one layer card. In the class, I really enjoyed all the different masking technique, though I really liked using masking to create a background and inspired today's card.
Written and photos Masking an ink blended background for a 1 layer card:
Start off by trimming a piece of Altenew Masking Paper down to a 5.5" x 4.25" panel. Next, use a Waffle Flower A2 layer rectangle die to cut out a window in the masking paper. Next, add there the masking paper frame directly to a white card base.
Place the card base into your MISTI and stamp the leaf branch from the Altenew Tall Foliage stamp set in black ink. In addition, also stamp this onto a piece of masking paper. Fussy cut this masking paper foliage stamp out, cutting just inside the stamped outline.

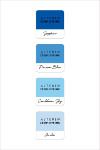
Next, position the masking stamp over the stamped image on the card base to cover it up. Using an Altenew Blending Tool start to ink blend blues onto the panel. Start off blending Iceberg onto the panel fasing into the middle.

Then blend on Carribean Sky and Ultramarine, ensure your create a spotlight affect with the darker colours only towards the outer edge. After the ink blending is complete, remove all the masks for a crisp one layer card.


Shopping list for Masking an ink blended background for a 1 layer card:
Links to supplies at Bumbleberry Papercrafts Shop:
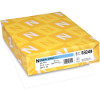
 Neenah Classic Crest Solar White 110lb Cardstock Shop at: BP |
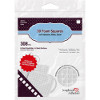
 Scrapbook Adhesives 3D foam squares 1/4" white Shop at: BP |
 Original MISTI 2 - My Sweet Petunia Shop at: BP |
 Glacier Caves Mini Ink Cubes - Altenew Shop at: BP |
 Ink blending tool large - Altenew Shop at: BP |
 Lapis Lazuli Mini Cube Set - Altenew Shop at: BP |
 Tall Foliage Stamp set - Altenew Shop at: BP |
 Masking Paper - Altenew Shop at: BP |
 Glacier Caves Enamel Dots - Altenew Shop at: BP |
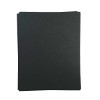
 Black Cardstock - Concord & 9th Shop at: BP |
If you enjoyed this post and create a card like this, make sure you share it in the Bumbleberry Craft Room on Facebook for us to check it out!
Until next time!
Verity


Love your card Verity. I shall have to try this technique. It’s very sophisticated ❤️