
Hello there, it is Verity here from Pretty Little Button for the Bumbleberry Design team. Slim-line cards are very on-trend at the moment, and most companies bringing out dies are US based and suit US cards/envelopes. However, we can still use them to create cards with their sizing or altering them to create cards that fit in the standard UK envelopes. So today's card uses the PinkFresh Studio Essentials: Slim-line Stitched Rectangles to create UK DL cards which measure 10cm X 21cm. These current dies measure 9.7cm X 22.5cm, so a tad too long for our cards! This length of the card also allows you to create CAS cards with a repetitive design horizontally, so let's get started!
Written and photos Altering your Slim-line dies for any length of card:
To start off, position the outmost stitched rectangle from the PinkFresh Studio Essentials: Slim-line Stitched Rectangles and position this onto a piece of white cardstock. Next, place this between your cutting plates in your die-cutting machine.
Before running this through your machine, position the top plate so that at least 1.5cm of the card and die hangs outside of the top plate. When you run this through our machine, the die will only cut underneath the top plate, and not where it hangs outside of the plate.
Remove the die, and adjust to move the top end of the die so that it now lines up across the end where the card has not cut. The stitch cut lines in the die should 'slot' into the already cut lines. Now run this through your machine and this will now finish die-cutting the rectangle out for you with our altered size.
For the rest of the card, die-cut three of the PinkFresh Studio Floral Circles designs out of white card 3 times to layer up for dimension. Next, smoosh an embossing ink pad down over the die cuts, cover with gold heat embossing and heat set.
To create the background, use an Altenew ink blending tool to blend on blue and teal colour inks onto the stitched die-cut rectangle. For added interest, add ink splatter from one of the inks by smooshing down onto an acrylic block and spritz with water. Next, flick this onto the panel using a paintbrush of the edge of the acrylic block.
Once the background is dry, foam mount the panel onto a white DL card base. Next, using liquid glue adhere the heat embossed floral circles onto the front over the ink blending.
For the sentiment, heat emboss a sentiment from the PinkFresh Studio Leafy Decor stamp set onto black card in white heat embossing and foam mount in the centre to finish the card off.
If you enjoyed today's card, please let us know and we would love to see your cards if this has inspired you.
Shopping list for Altering your Slim-line dies for any length of card:
Links to supplies at Bumbleberry Papercrafts Shop:

Gina K Designs - Connect Glue
Shop at:
BP
|
Neenah Classic Crest Solar White 110lb Cardstock
Shop at:
BP
|

Neenah Classic Crest Solar White 80lb Cardstock
Shop at:
BP
|
Scrapbook Adhesives 3D foam squares 1/4" white
Shop at:
BP
|
Original MISTI - My Sweet Petunia
Shop at:
BP
|
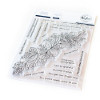
Leafy Decor stamp - PinkFresh Studio
Shop at:
BP
|

Ink blending tool large - Altenew
Shop at:
BP
|
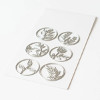
Floral Cirlces die - PinkFresh Studio
Shop at:
BP
|
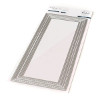
Essentials: Slim Stitched Rectangles - PinkFresh Studio
Shop at:
BP
|
|
If you enjoyed this post and create a card like this, make sure you share it in the Bumbleberry Craft Room on Facebook for us to check it out!
Until next time!
Verity

Pretty Little Button Blog | Instagram | Facebook | Youtube


