Hello My Crafty Friends, Its Jo here from Daisy D's Design's, for the Bumbleberry Design Team Blog Post.
I hope you all well, and keeping safe.
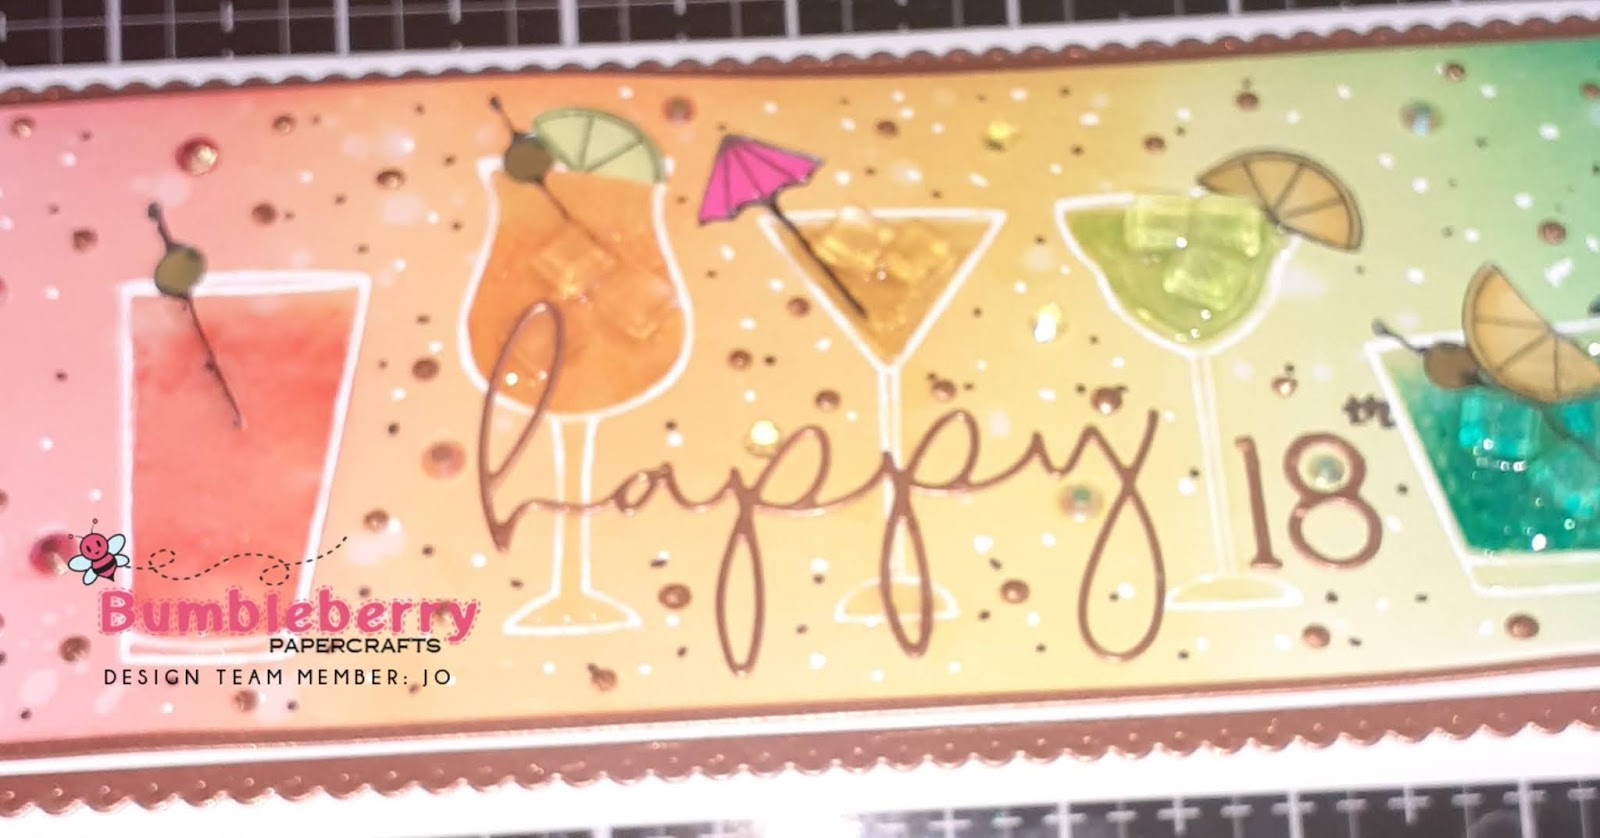
I have a another extremely on trend at the moment,slimline card for you, but today were turning on its side.
Products
Honey Bee Stamps Raise A Glass Stamp
https://www.bumbleberrys.co.uk/collections/honey-bee-stamps/products/raise-a-glass-6x6-stamp-set
Honey Bee Stamps Slimline sentiments Eyelets
https://www.bumbleberrys.co.uk/collections/honey-bee-stamps/products/slimline-sentiments-honey-cuts
Embossing Ink Pad
White Embossing Powder
Ranger Distress Inks (rainbow choice of colour)
Gina K Cardstock In Copper
Neenah Cardstock 80lb
Neenah Cardstock 110lb for Card Blank. (cut at 7" x 8 1/2 " scored at 3 1/2)
For your Envelope (this card fits a regular slimline business envelope also known as a DL size card and Envelope.
Double Sided Mounting Tape or Squares
Alcohol Markers
Glossy Accents
Nuvo Crystal Drops Copper Penny Drops
White Jelly Roll Pen
My Favorite Things Ice Cubes Gems
Lucy's Little Things Multi Coloured Gems
Method
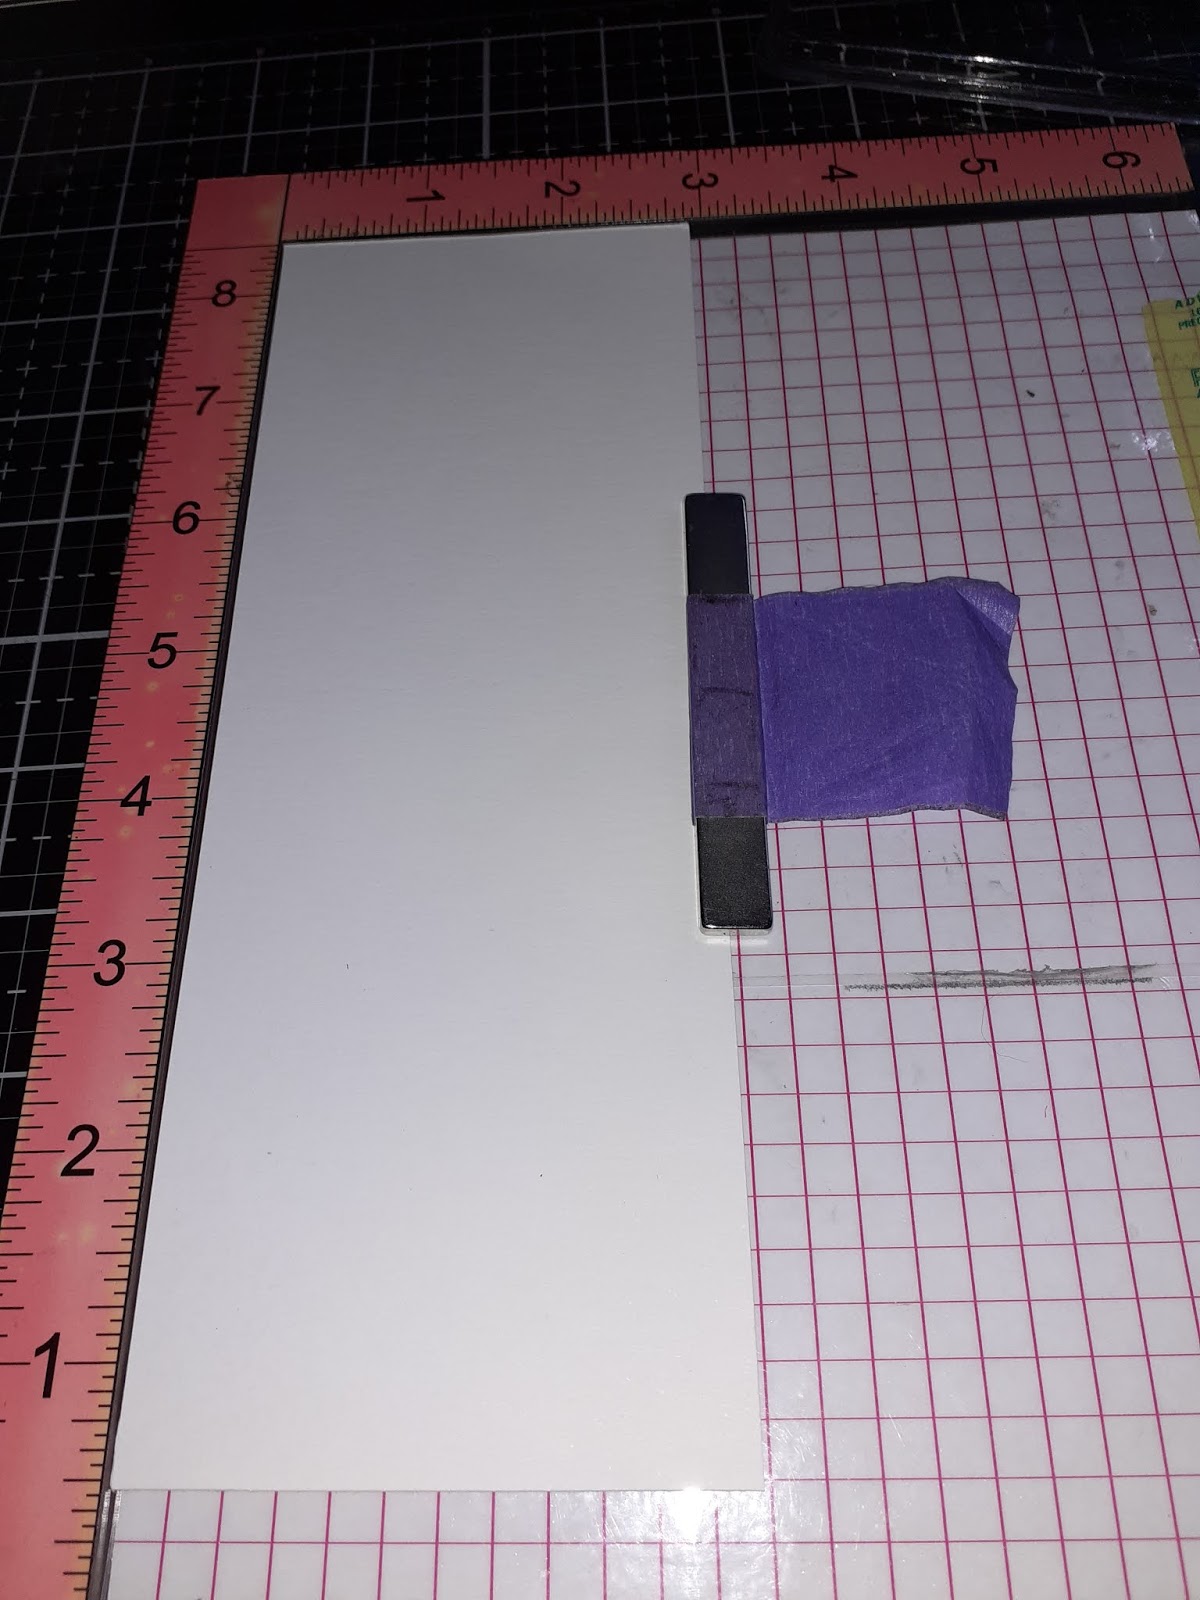
Using the slimline and eyelet die cut the center out of neenah 80lb cardstock.

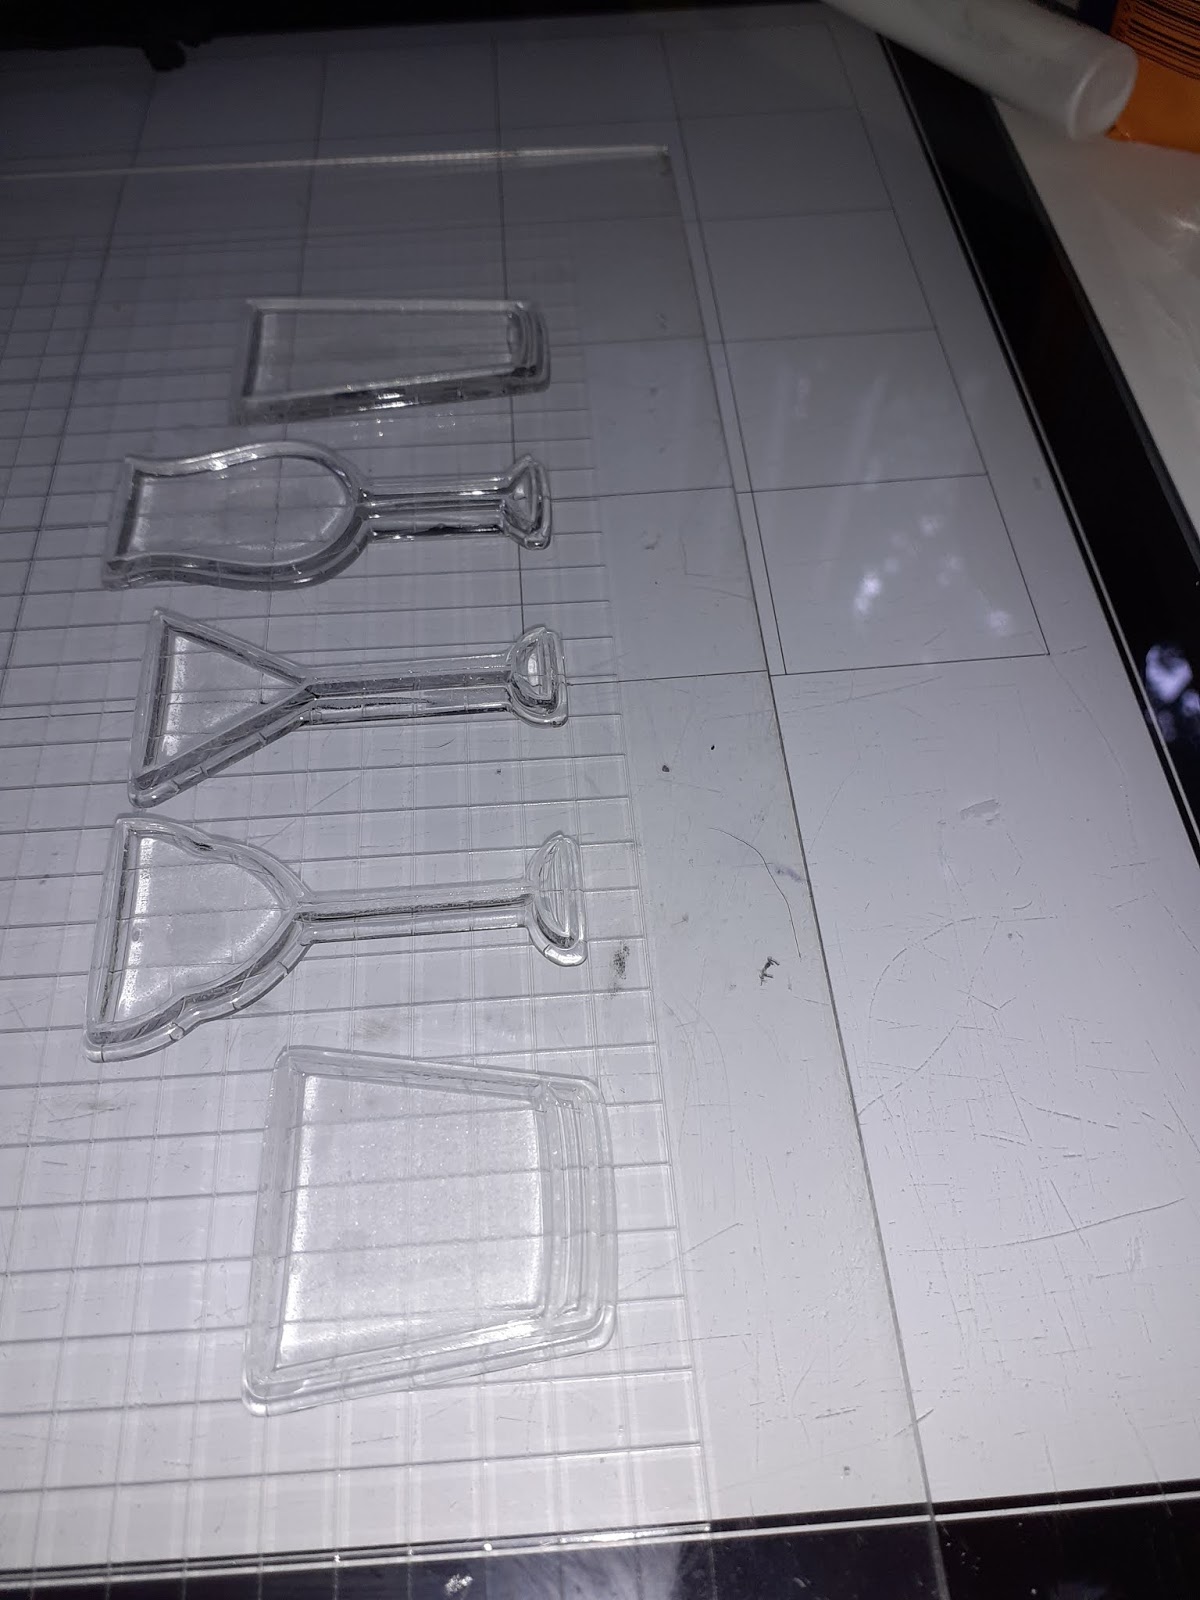
Line up your stamps of the glasses alone a line so they are all in a row.
Stamp them in versamark or embossing inkpad.
Then emboss in white embossing powder.
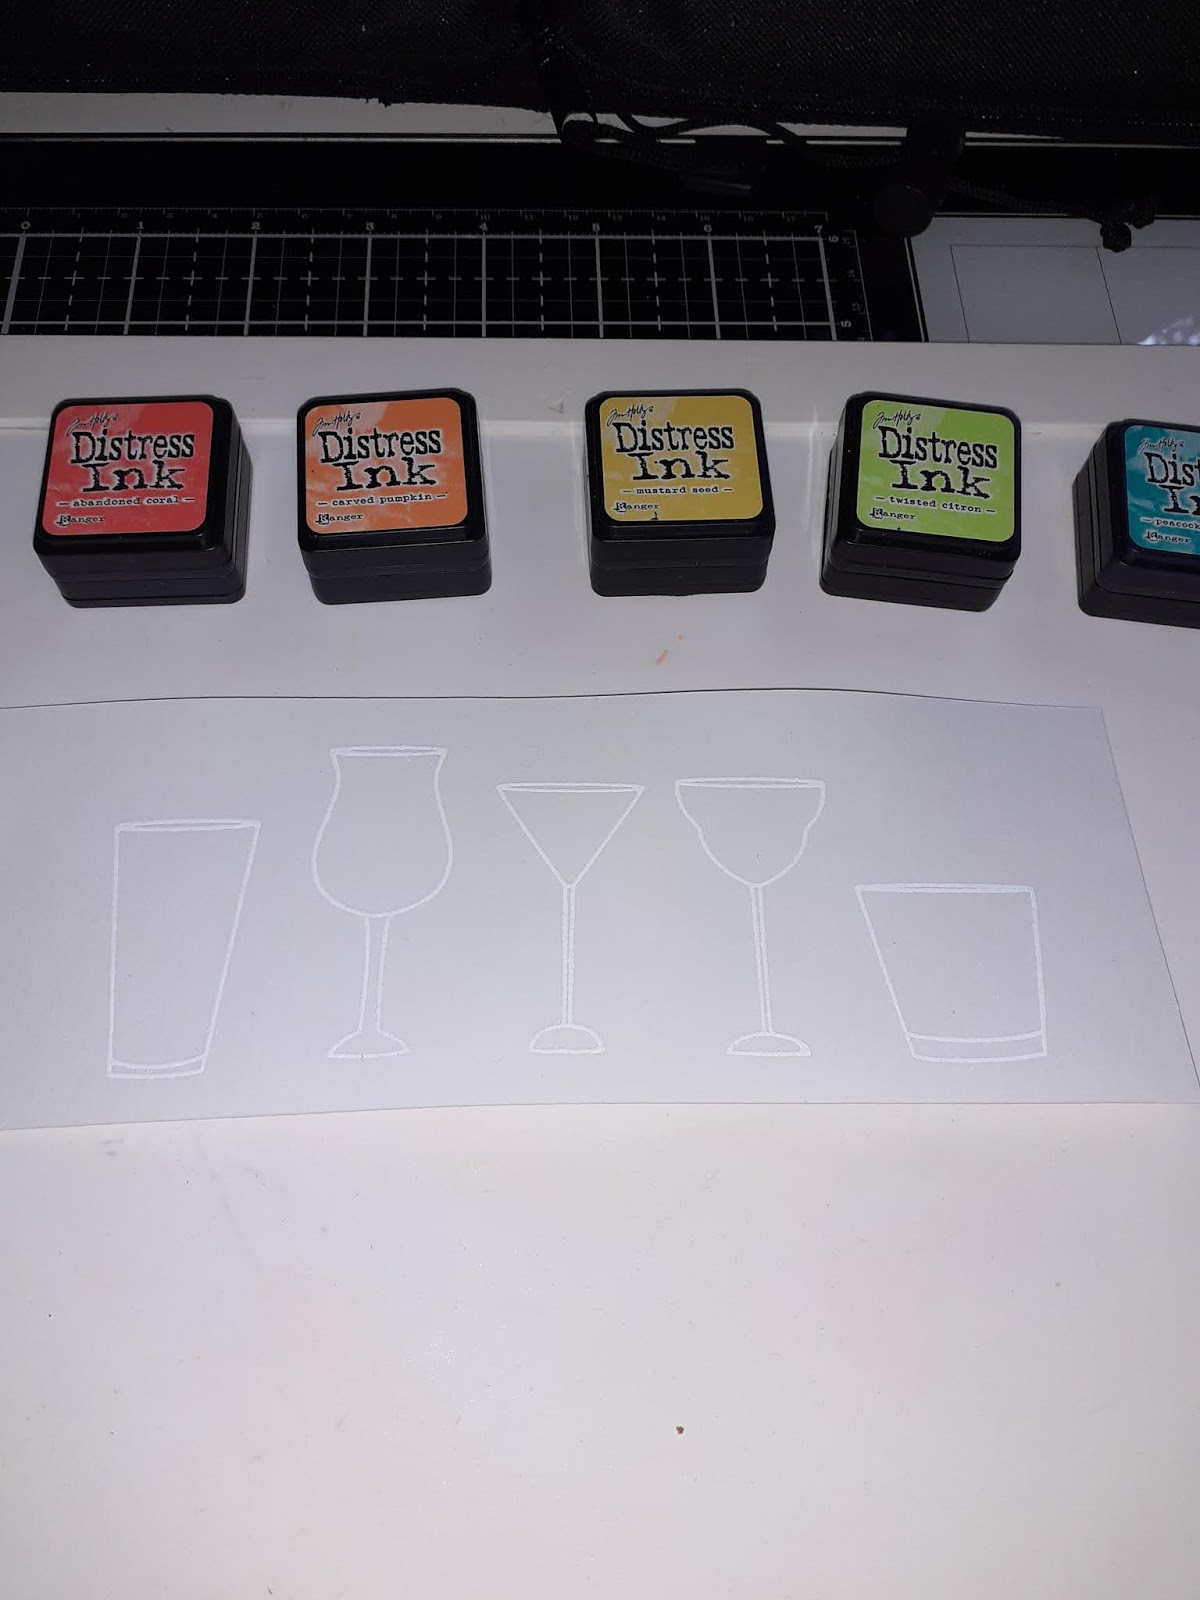

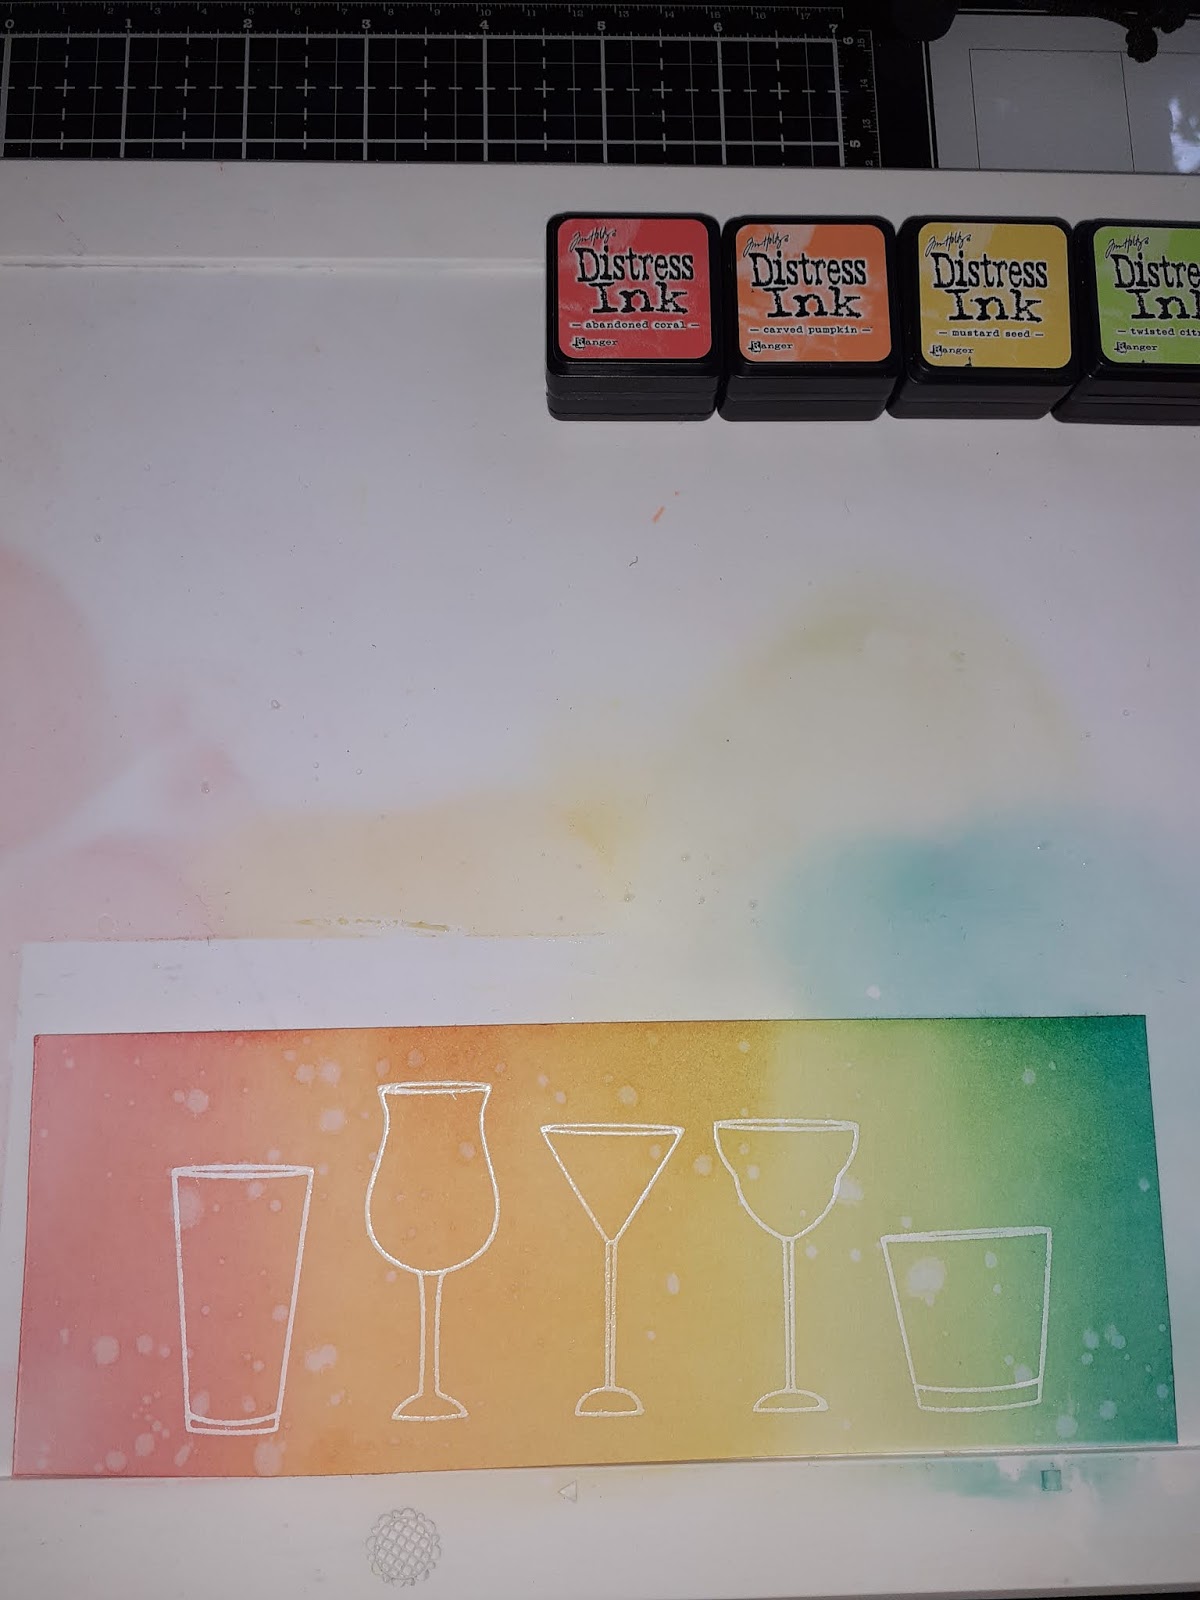
Blend on your rainbow of ink over your stamped image.
Then add a splatter of water and using a paper towel lift of the colour. This creates a splattered look to your work.

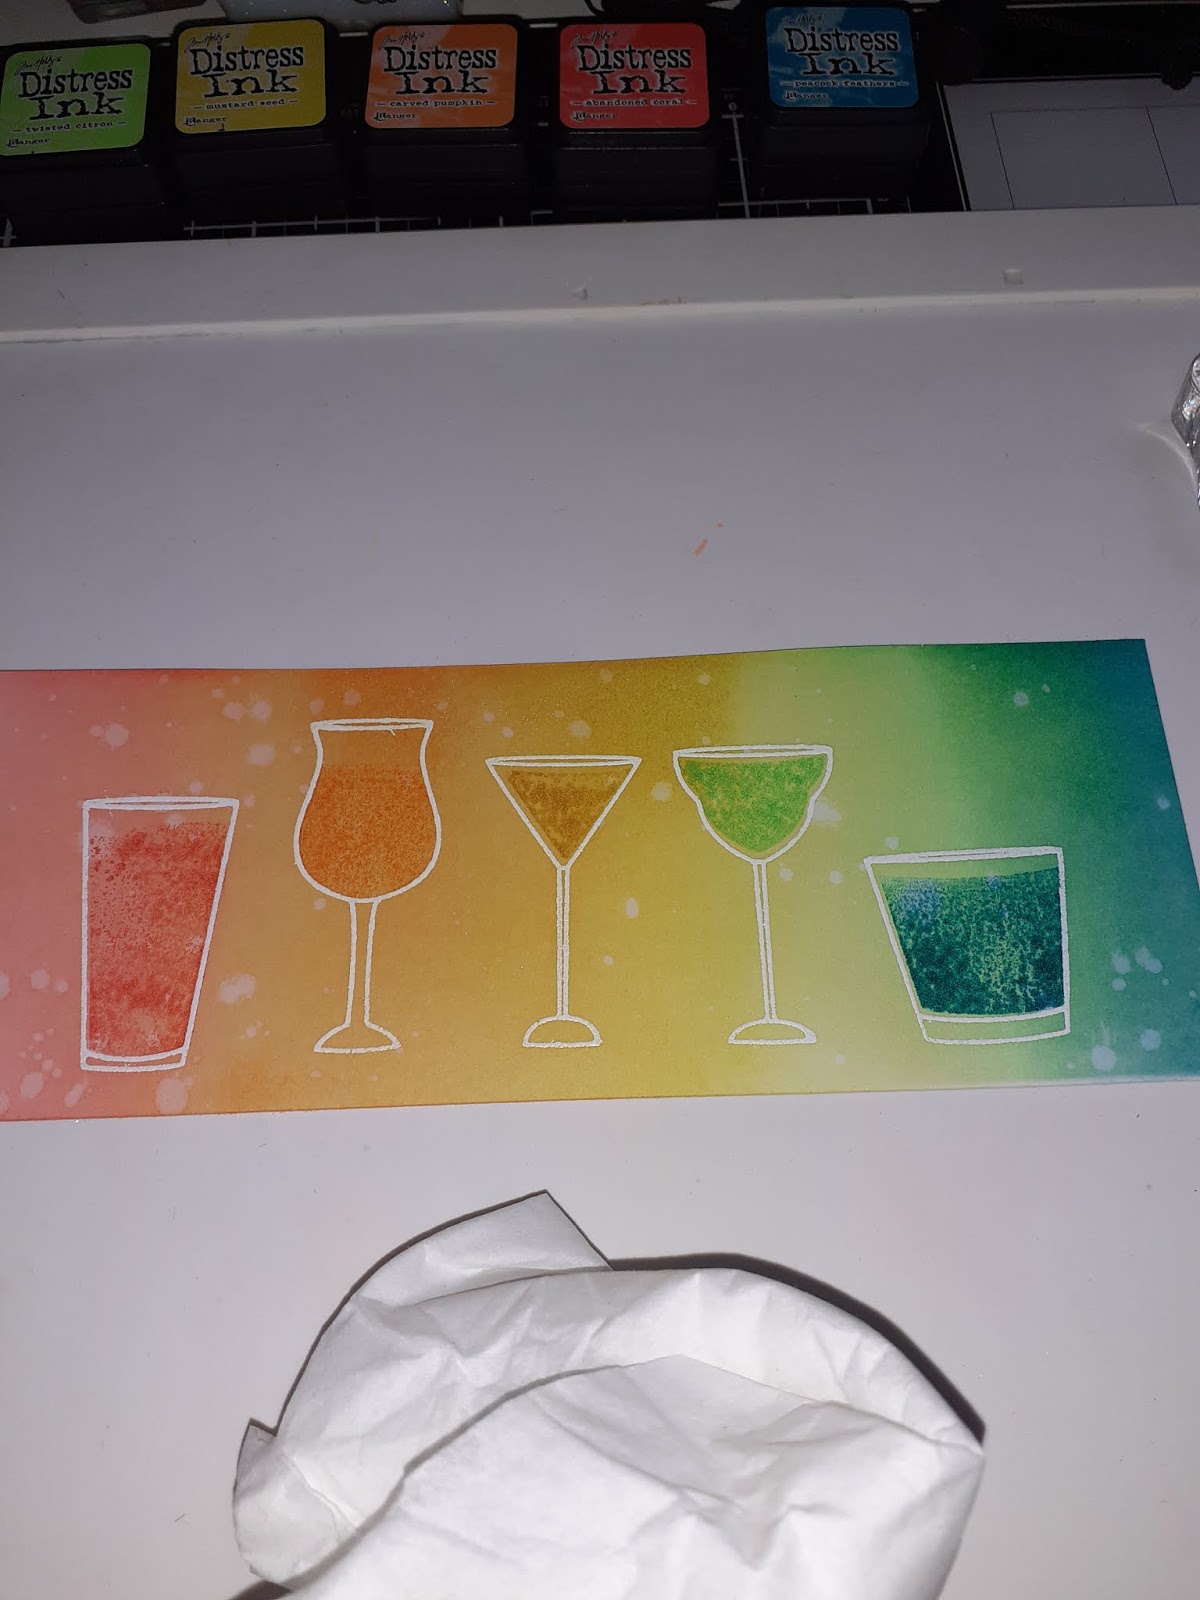
Then using the coordinating stamped solid image to your glass, using the same ink colour as the background fill in the middle of the glass.

Die cut the frame and inner area out of the copper card stock, then place the boarder on to slim line card blank.
Use the inner piece to attach to your work using double sided mounting foam. This add's depth to your design.
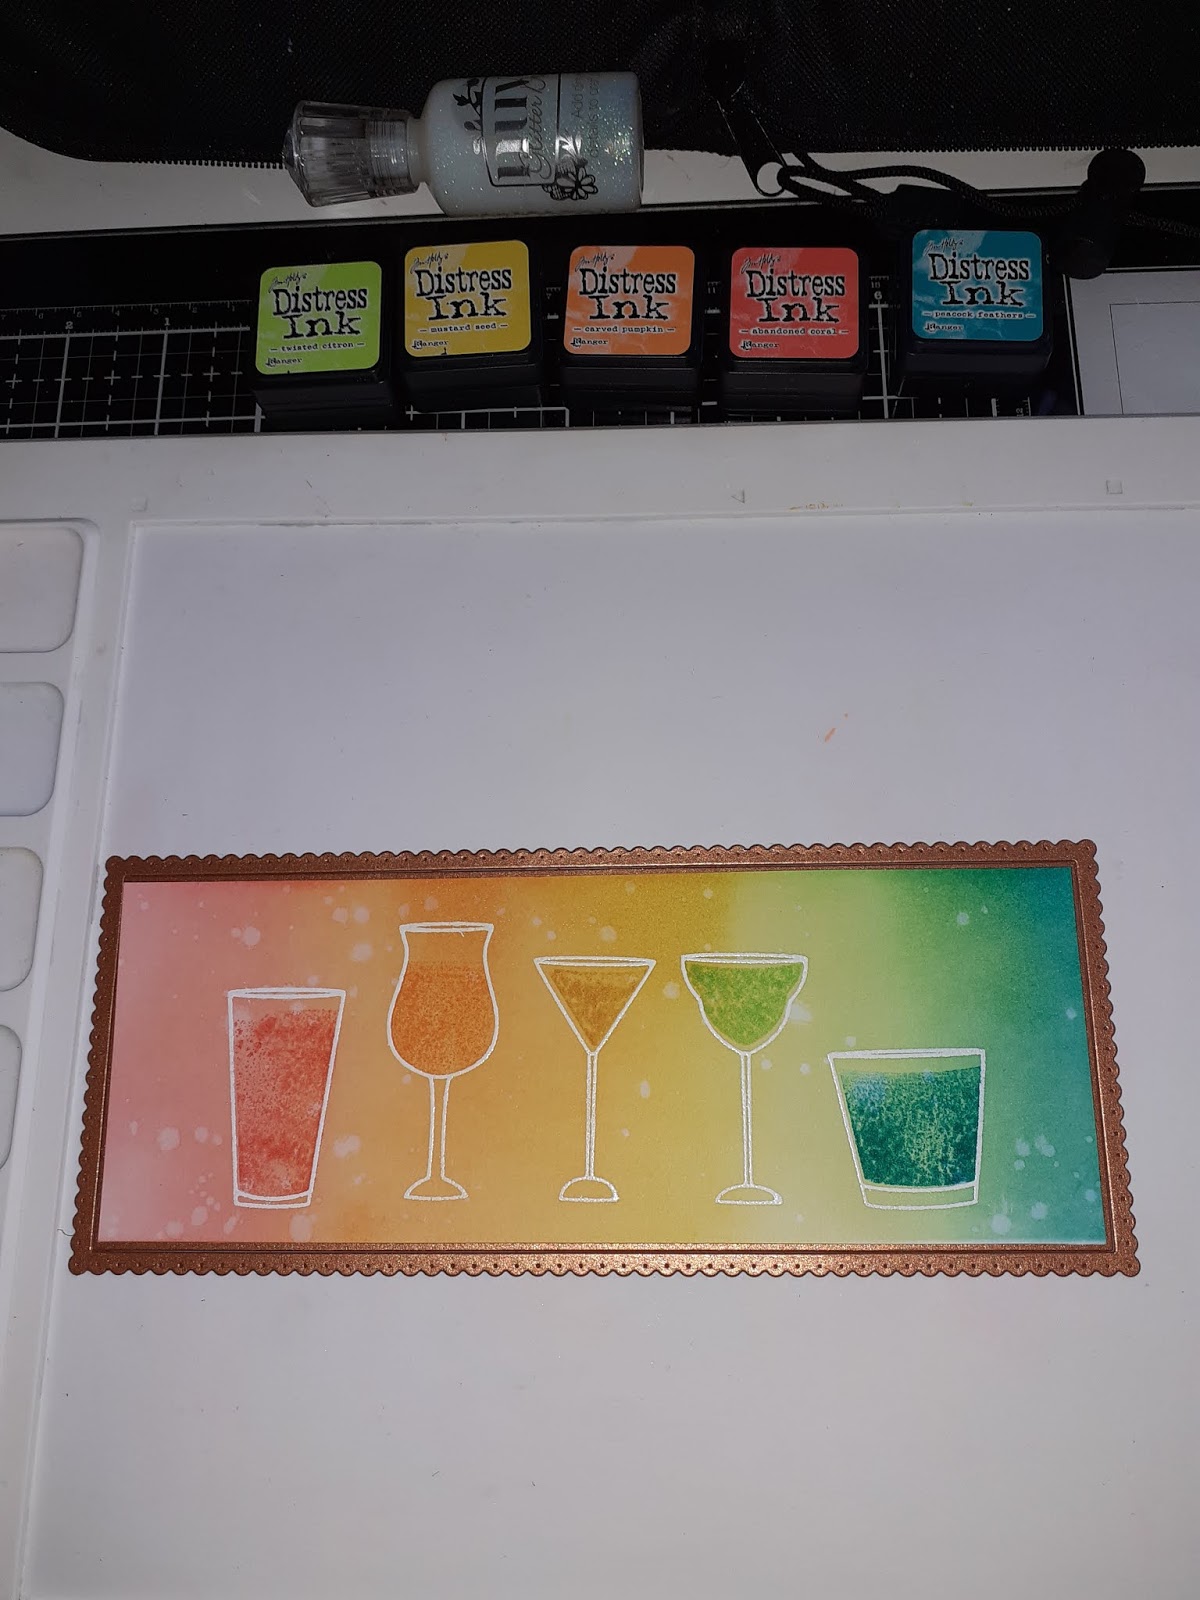
Matt on your rainbow glass design.
Then die cut your sentiment font, as their are a few in the set to choose from.
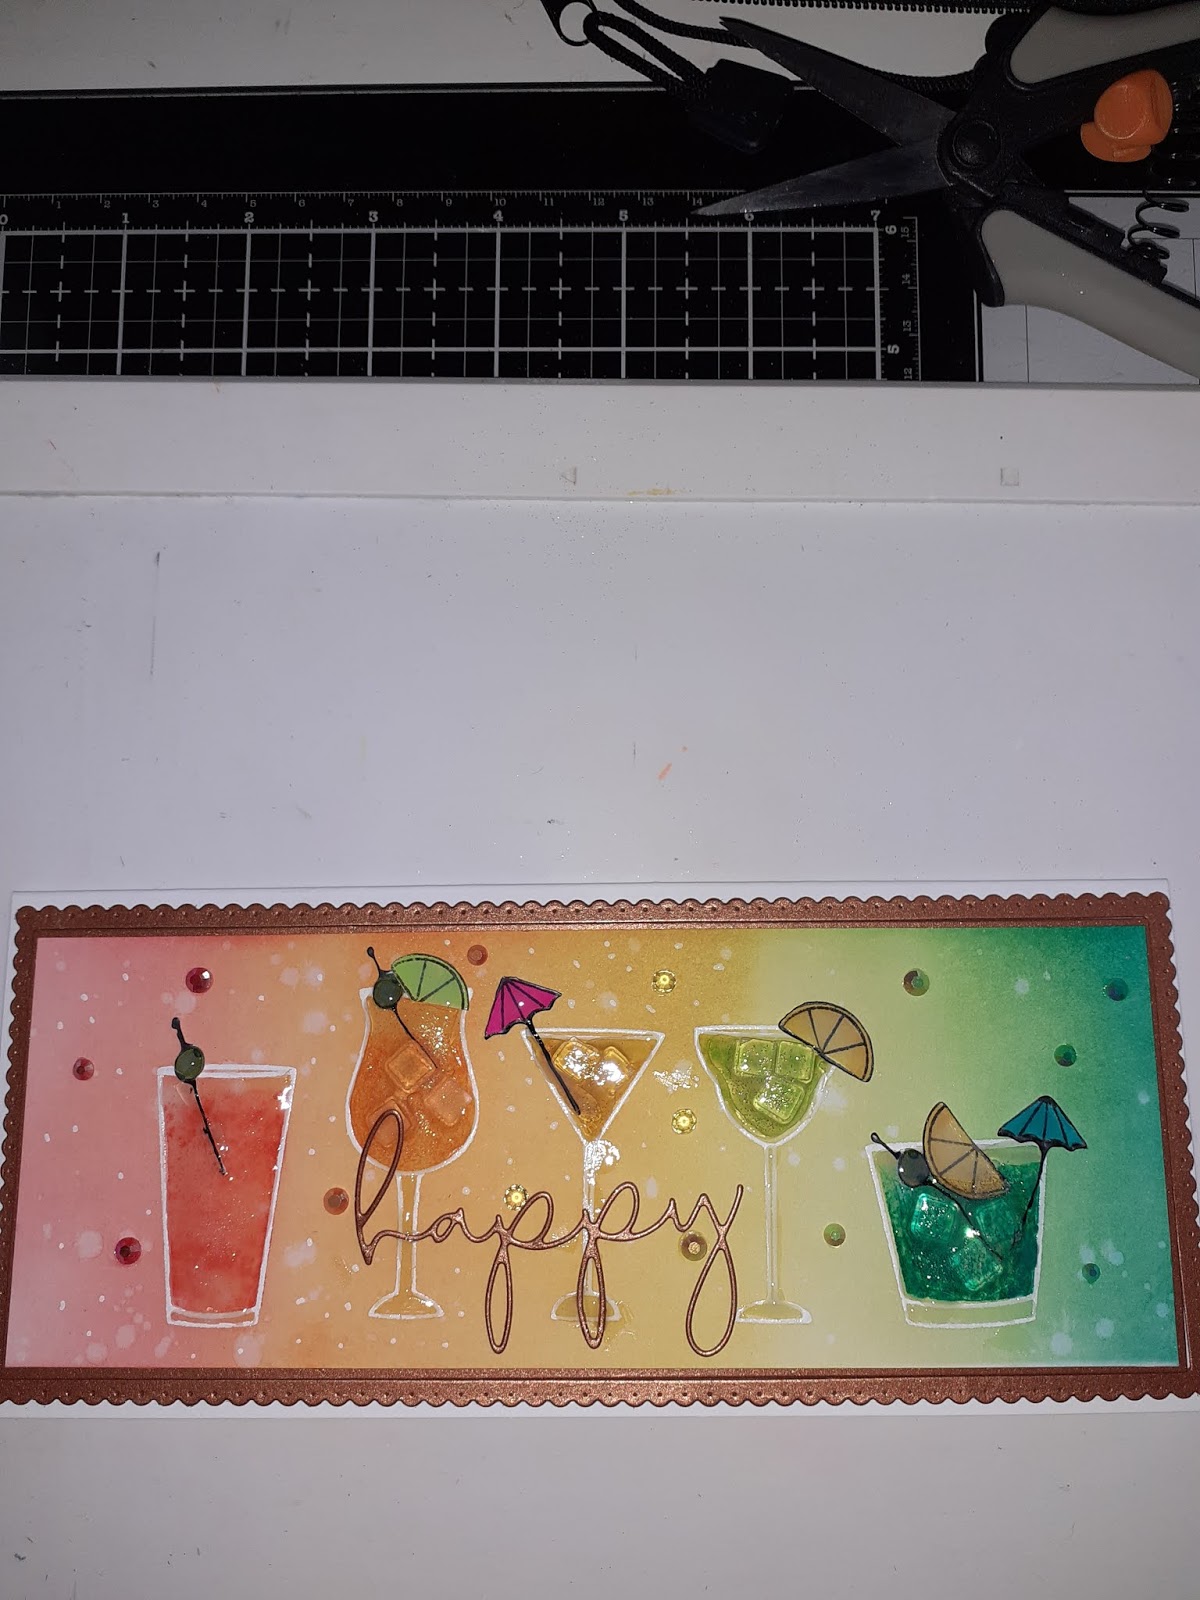
Before adding to your card front add some stamped in alcohol friendly ink and alcohol coloured images in and around your glasses.
Then add glossy accents to the glasses themselves and I added so little ice cube accessories from MFT that I had but there are other gems you can us.
After it all dried. I added my HAPPY sentiment plus an 18 as this is for a daughters friend.
I also added some white dots, multi gems and some nuvo copper penny drops around my work.
I had to stop myself from over embellishing.

I do hope you enjoyed this weeks cards.
Happy Stamping
Jo
xxx