
Hello there, it is Verity here from Pretty Little Button for the Bumbleberry Design team. So who says leaves have to be green?! I thought this Leafy Decor stamp from PinkFresh Studio would be a great stamp for partial die-cutting to create a border card. And I think it turned out quite well. I decided to go for an alternative colour scheme, as I wanted to play with colour more, rather than stay with traditions. Hopefully, you'll think it's a success - for me, it is a success!
Written and photos partial die-cut heat embossed border card:
To start, stamp in clear embossing ink the PinkFresh Studio Leafy Decor stamp onto Ranger Distress Watercolour cardstock panel that is cut down to 5.25" x 4. Next, cover this with Metallic Platinum embossing powder and heat set.
Using a selection of pink Zig Clean Color Real Brush markers, start to colour in the leafy design. If you don't have these in, you can use regular watercolour paints to colour the design in. Make sure you use a variety of pinks to add depth and dimension.
Once dry, place the PinkFresh Studio Leafy Decor Die over the heat embossed image and tape to keep this in place. Next, you'll need to run this through your die-cutting machine, however, to partially die-cut this, only have half of the top part of the stamped design sandwich between you die-cutting plates. The majority of the paper and half of the design should hang out from the plates and when run through the machine the die will only cut where it is between your cutting plates. .
Remove the die and the top half of the distress watercolour cardstock around the embossing, and the top part of the design should come away. For the background piece, heat emboss in white embossing powder the Altenew PinStripe background onto a card panel made out of Gina K Innocent Pink Cardstock and foam mount this onto a card base made out of Neenah Classic Crest Solar White 110lb cardstock.
Next, foam mount your partial die-cut heat embossed border panel onto the card base. Onto a piece of black card, heat emboss one of the sentiments from the stamp set in white embossing powder. Trim the one end down into a flag end and foam mount onto the card.
Lastly, finish off with a few Tonic Nuvo Jewel drops to embellish the card.
If you enjoyed today's card, please let us know and we would love to see your cards if this has inspired you.
Shopping list for partial die-cut heat embossed border card:
Links to supplies at Bumbleberry Papercrafts Shop:

Gina K Designs - Connect Glue
Shop at:
BP
|
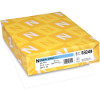
Neenah Classic Crest Solar White 80lb Cardstock
Shop at:
BP
|
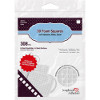
Scrapbook Adhesives 3D foam squares 1/4" white
Shop at:
BP
|
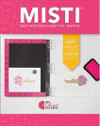
Original MISTI - My Sweet Petunia
Shop at:
BP
|

Pinstripe - Altenew
Shop at:
BP
|
Teflon Bone Folder - Lawn Fawn
Shop at:
BP
|
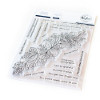
Leafy Decor stamp - PinkFresh Studio
Shop at:
BP
|
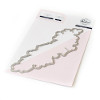
Leafy Decor Die - PinkFresh Studio
Shop at:
BP
|

Innocent Pink Heavy Weight Cardstock - Gina K Designs
Shop at:
BP
|
|
If you enjoyed this post and create a card like this, make sure you share it in the Bumbleberry Craft Room on Facebook for us to check it out!
Until next time!
Verity


