Hello there, it is Verity here from Pretty Little Button for the Bumbleberry Design team. If you've tried ink blending many times, you may struggle to get that soft ink blended look. But that is a thing of the past! If you've not tried the Altenew Ink Blending tool, then it's a must for creating a background with soft ink blending! I used it along with the PinkFresh Studios Lush Vines background stamp to create this fresh and vibrant card. So let's get started!
Written and photos Creating a background with soft ink blending :
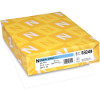
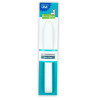
To start off, trim a piece of 80lb Neenah Classic Crest Solar White cardstock to a card panel size. Next, use an Altenew Blending tool to apply yellow dye ink to one end of the panel. This tool is perfect for creating a nice soft ink blend. It is very easy to use with an ergonomic handle which ensures you hold it comfortably without putting too much pressure onto the cardstock.
After you have blended the yellow onto a third of the card, next start to add in green ink. You can clean the ink off on a scrap of paper, or if like me have a tool dedicated to each colour of the rainbow to make it quick to blend. Either way works just as well. Make sure you overlap the colours to smooth out the blend.
To finish off the background blending, ink blend a blue dye ink to the top third of the card panel, blending this into the green ink. Trim this panel down to 1/4 inch smaller than an A2 card base.
To stamp the background design, place the card panel into your MISTI platform, adding a little prepositional tape to the back. This will allow you to use a red rubber stamp without the need for magnets and you can repeat stamp.
Next, ink up the PinkFresh Studios Lush Vine stamps in the same colour of dye inks. To reduce any harsh lines, use a blending foam pad to blend the colours on the stamp. Close your MISTI door and stamp the design down. If you need to, you can re-ink the stamp and stamp once more for perfect stamping.
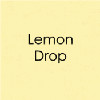
To assemble the card, foam mount the card panel onto a card base made out of Gina K Lemon Drop cardstock. For the sentiment, die-cut the Lovely word die from the PinkFresh Studio Phrase Builder: Hello out of Nautical Hero Hues cardstock three times to layer up. Also die-cut the shadow out of white card to add the layered die-cut too.
Foam mount the sentiment onto the front of the card and add a stamped sentiment from the Altenew Sentiment Strips stamp set. Lastly, add a few blue sequins to finish the card off.
If you enjoyed today's card, please let us know and we would love to see your cards if this has inspired you.
Shopping list for Creating a background with soft ink blending :
Links to supplies at Bumbleberry Papercrafts Shop:

Gina K Designs - Connect Glue
Shop at:
BP
|

Neenah Classic Crest Solar White 80lb Cardstock
Shop at:
BP
|

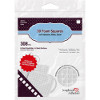
Scrapbook Adhesives 3D foam squares 1/4" white
Shop at:
BP
|

Original MISTI - My Sweet Petunia
Shop at:
BP
|

Lemon Drop Heavy Weight cardstock - Gina K Designs
Shop at:
BP
|

Teflon Bone Folder - Lawn Fawn
Shop at:
BP
|

Nautical Hero Hues Cardstock - Hero Arts
Shop at:
BP
|

Sentiment Strips 2 - Altenew
Shop at:
BP
|

Ink blending tool large - Altenew
Shop at:
BP
|

Phase Builder: Hello Dies - PinkFresh Studio
Shop at:
BP
|

Lush Vines - PinkFresh Studio
Shop at:
BP
|
If you enjoyed this post and create a card like this, make sure you share it in the Bumbleberry Craft Room on Facebook for us to check it out!
Until next time!
Verity

Pretty Little Button Blog | Instagram | Facebook | Youtube


