Hello there, it is Verity here from Pretty Little Button for the Bumbleberry Design team. If you have a lot of ink pads or re-inkers in your stash and are looking for more ways to use them, then this technique is just what you've been looking for. Whatsmore, if you've wanted to get that watercolour look but don't have any watercolour paints then this technique is a great way to achieve it. You can use your dye inks to watercolour in, and pair it with heat embossing to make it that one step easier for even a novice watercolourist.
Written and photos Using your dye inks to watercolour:
Start off by placing a piece of watercolour cardstock into a MISTI stamping tool. Next, position a variety of stamps from the Altenew Wild & Free stamp set onto the card and stamp in clear embossing ink.
Cover the stamped images in Platinum embossing powder and heat set ready to watercolour in. To use your inks, you need to add ink to a palette - an acrylic stamping block works well for this, ad once you're finished you can easily wipe these clean. Add drops of ink from your re-inkers or smoosh an ink pad down onto block to transfer the ink.
To reduce the amount of 'work' you have to do with the colours, it is easiest to use the wet on wet technique. First of all, apply a layer of clean clear water to one petal. Next, use a brush to dip into your in on the block and add the colour to the base of the petal. The wet water of the petal will then spread the ink out. You can go in and pull the colour out and soften up the petal.
Allow that petal to dry and move onto another petal, just make sure this petal is not right next to the one you have just painted. This will prevent the colours bleeding into each other, but as we have heat embossed the petal this is even less likely to happen.
Once all the elements are painted, fussy cut the images out - you can use the co-ordinating dies if you don't mind the white outline. For the background, stamp the Altenew Dainty Swiss Dots stamp in grey ink onto a white card panel. Trim the panel down and add this to a white card base.
Use varying depths of dimension and liquid adhesive to add the flowers to the card along the left-hand side. Add a heat embossed the sentiment from the Dainty Swiss stamp set offset to one side Lastly, finished with a selection of sequins to embellish the card.
If you enjoyed today's card, please let us know and we would love to see your cards if this has inspired you.
Shopping list for Using your dye inks to watercolour:
Links to supplies at Bumbleberry Papercrafts Shop:

Gina K Designs - Connect Glue
Shop at:
BP
|

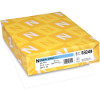
Neenah Classic Crest Solar White 80lb Cardstock
Shop at:
BP
|

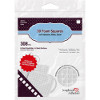
Scrapbook Adhesives 3D foam squares 1/4" white
Shop at:
BP
|

Original MISTI - My Sweet Petunia
Shop at:
BP
|

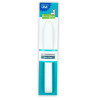
Teflon Bone Folder - Lawn Fawn
Shop at:
BP
|

Wild & Free - Altenew
Shop at:
BP
|

Dainty Swiss Dots - Altenew
Shop at:
BP
|
If you enjoyed this post and create a card like this, make sure you share it in the Bumbleberry Craft Room on Facebook for us to check it out!
Until next time!
Verity

Pretty Little Button Blog | Instagram | Facebook | Youtube


