
Hello there, it is Verity here from Pretty Little Button for the Bumbleberry Design team. This Retro Plantine stamp set from Altenew has such fun foliage which when paired with bold colours creates a stunning retro feel. However, you can step the stamping up a notch by also doing a bit of fun retro ombre stamping with your inks for added interest. As well, pair this with the Parlor Palm die set and you can create a fun little potted plant to adorn your card.
Written and photos Retro Ombre stamping :


The best way to make sure the stem lines up with the die-cut, is to first die-cut the shape before you stamp. Once die-cut, place the die-cut back into the negative space in the card and place in the MISTI.
Next, place the stem over the die-cut, close your MISTI door and then stamp in the colour of your choosing. Repeat this for the bud and you should now have a perfectly stamped and die-cut stem and bud.

For the background on this card, dry emboss(according to your die cutting machine with an embossing amt), the Altenew Grid stencil onto Gina K Slate cardstock. Trim this down to 1/4 small than a matching card base and foam mount onto the front. To add a little more interest, splatter the Pure White Ink Spray from Altenew onto the background.
For the pot, die-cut the pot out of the Parlor Palm Die set and use directly to paper method to add ink colour to the pot. Assemble the design by using 3D foam pads to layer up the foliage and adhere to the pot with Gina K Connect glue.


Shopping list for Retro Ombre stamping:
Links to supplies at Bumbleberry Papercrafts Shop:
 Gina K Designs - Connect Glue Shop at: BP |
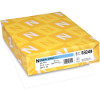 Neenah Classic Crest Solar White 80lb Cardstock Shop at: BP |
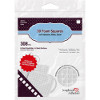 Scrapbook Adhesives 3D foam squares 1/4" white Shop at: BP |
 Soft Stone Heavy Weight Cardstock - Gina K Designs Shop at: BP |
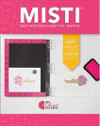 Original MISTI - My Sweet Petunia Shop at: BP |
 Grid Stencil - Altenew Shop at: BP |
 Slate - Gina K designs Shop at: BP |
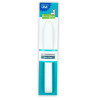 Teflon Bone Folder - Lawn Fawn Shop at: BP |
 Retro Plantines stamp - Altenew Shop at: BP |
 Retro Plantines die - Altenew Shop at: BP |
 Parlor Palm Die set - Altenew Shop at: BP |
 Pure White Ink Spray - Altenew Shop at: BP |
If you enjoyed this post and create a card like this, make sure you share it in the Bumbleberry Craft Room on Facebook for us to check it out!
Until next time!
Verity

