Hello there, it is Verity here from Pretty Little Button for the Bumbleberry Design team. Today I've got two cards for created with just one wreath stamp set. You can easily switch up a design and create two different looks with hardly any event. Whatsmore, change the colour scheme and you have even more looks. Both cards are so easy to make, so let's get started!
Written and photos One wreath, two looks!:
Bold CAS wreath card:
For the first look, we are going to create a CAS wreath card without the outline stamp stamped however we can still use this to align layers. Place the outline layer down onto a piece of white card inside your MISTI but do not close the door. Next, align the first layer of foliage on top of the outline stamp. Close you MISTI door, picking up the foliage layer and remove the outline layer.

Ink this first layer up in green Ink and stamp onto your card panel. Now, reposition the outline layer over the top of your stamp and repeat aligning the second layer of the foliage and stamp once more.

Once all the foliage has been stamped, repeat the process off aligning the outline layer over your stamping to align the two layers of florals. These florals were stamped in two shades of navy blue ink. Once all the stamping is complete, you have a bold stamped wreath design.

To finish the card off, add a sentiment from the stamp set to the front. Here part of the sentiment was heat embossed in white onto Nautical Hero Hues Cardstock. Laslty, to finish the card off, add a selection of navy sequins to the wreath.

Repeat pattern print card:
For the second card, we are going to just use the outline stamp to create a repeat pattern print background. Place a piece of white card into your MISTI and position the outline stamp over your card, hanging off the edge.


Shopping list for One wreath, two looks!:
Links to supplies at Bumbleberry Papercrafts Shop:
 Gina K Designs - Connect Glue Shop at: BP |
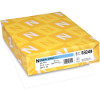
 Neenah Classic Crest Solar White 110lb Cardstock Shop at: BP |
 Neenah Classic Crest Solar White 80lb Cardstock Shop at: BP |
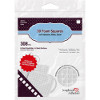
 Scrapbook Adhesives 3D foam squares 1/4" white Shop at: BP |
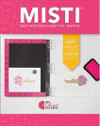
 Original MISTI - My Sweet Petunia Shop at: BP |
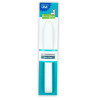
 Teflon Bone Folder - Lawn Fawn Shop at: BP |
 Sentiment Strips - Altenew Shop at: BP |
 Nautical Hero Hues Cardstock - Hero Arts Shop at: BP |
 Blossom Wreath - Altenew Shop at: BP |
If you enjoyed this post and create a card like this, make sure you share it in the Bumbleberry Craft Room on Facebook for us to check it out!
Until next time!
Verity

