
Hello there, it is Verity here from Pretty Little Button for the Bumbleberry Design team. Do you love to use die cuts on your cards, but want to stretch how you use them and get more from them? Adding colour detail with your Copic markers, or any other alcohol marker is a quick way to change up your regular die cuts from plain cardstock and make your card stand out. What's more, you can use a layering floral die such as this layered rose die from Altenew and use the layers independently to stretch your design.
Copic coloured die-cut florals video:
Copic coloured die-cut florals photos and written step-by-step:
To begin with use the Gradient Lines cover die from Altenew to create a dry embossed background. Tape the cover-die to a piece of fog cardstock by Lawn Fawn, cut to a card panel size. You need to run this through your die cutting machine with an embossing mat and the sandwich setup according to your machine for dry embossing.

To create the colour floral die cuts, tape the dies down onto a piece of Neenah Classic Crest solar white 80lb cardstock and run this through the machine to cut the shapes out.

Start off adding a layer of your lightest Copic colour - I used RV02. Next, add a mid-tone colour ( I used RV06) and add this to the middle of the die cut, feathering your strokes outwards. Lastly, add your darkest tone (RV09) in the middle and only feather out slightly. To get a lovely blend on the die-cut, go back with your mid-tone colour and blend out the darker colour and then repeat with the lightest colour, blending between your mid-tone and light colour.


For the leaves, use the same process with YG95, YG97 and YG99 Copic markers. Layer the colour die cuts with a plain white full layer die cut helped make the florals stand out and adhere together with Gina K connect glue


Shopping list:
Links to supplies at Bumbleberry Papercrafts Shop
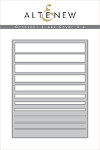 Altenew Gradient Lines Cover Die Shop at: BP |
 Lawn Fawn - Fog Cardstock Shop at: BP |
 Gina K Designs - Connect Glue Shop at: BP |
 Neenah Classic Crest Solar White 110lb Cardstock Shop at: BP |
 Scrapbook Adhesives 3D foam squares 1/4" white Shop at: BP |
 Altenew Layered Rose Die Shop at: BP |
I love the colour combination and how the fog colour complements the modern pop of pink from the florals. If you enjoyed this post and create a card like this, make sure you share it in the Bumbleberry Craft Room on Facebook for us to check it out!
Until next time!
Verity

