Hello there, it is Verity here from Pretty Little Button for the Bumbleberry Design team. I've been taking a few of the classes over on Altenew Acadamy, and I decided to create these two cards after taking Beyond the Basic Backgrounds class. I picked up several techniques there, some I knew about but never really used so I challenged myself to use them. What's great is you can make them as elaborate or as simple as you wish. However, I decided to one technique to create these two cards. It is a great away to combine your stamps and dies, and stretching them to go further by creating a DIY stencil.
Written and photos One background design two ways:
For these cards, you need to create a stencil. However, we're going to make two in one go - one to use as a stencil and the other for dimension over your stamping.
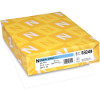
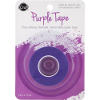
Trim down a piece of Neenah 80lb cardstock to your card base size and repeat this with a scrap piece of card. Next, use a bit of purple tape to temporarily adhere these two together. This will also use to die-cut both at the same time with the same design.

Next, choose the dies from the ALtenew Bold Bunch die set and position onto the card with purple tape, running this through your die-cutting machine. Repeat this, repositioning and rotating the dies until you have die-cut the panels completely.
Card one - Popped up card panel
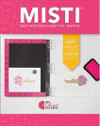
For the first card, place a piece of white cardstock into your MISTI and position the scrap die-cut panel over the top.
Position each of the first layers of stamps within the negative spaces of the stencil and stamp in a colour of your choosing. Continue moving the first layers and stamping until all spaces are filled. Next, repeat this with the second layer of stamping.


Card two- Stencilled base layer


Shopping list for One background design two ways:
Links to supplies at Bumbleberry Papercrafts Shop:
 Gina K Designs - Connect Glue Shop at: BP |
 Neenah Classic Crest Solar White 110lb Cardstock Shop at: BP |
 Neenah Classic Crest Solar White 80lb Cardstock Shop at: BP |
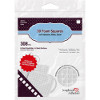
 Scrapbook Adhesives 3D foam squares 1/4" white Shop at: BP |
 Original MISTI - My Sweet Petunia Shop at: BP |
 Mini Ink Blending Tool - Ranger Tim Holtz Shop at: BP |
 Mini Ink Blending foam replacements - Ranger Tim Holtz Shop at: BP |
 Sentiment Strips - Altenew Shop at: BP |
 Bold bunch stamp - Altenew Shop at: BP |
 Bold Bunch Die - Altenew Shop at: BP |
 Purple Tape - 0.5" - Thermoweb Shop at: ALT |
If you enjoyed this post and create a card like this, make sure you share it in the Bumbleberry Craft Room on Facebook for us to check it out!
Until next time!
Verity


